Showing posts with label SRM stickers. Show all posts

Tuesday, December 23, 2014

I'm behind!

Hello!

I'm so running behind this year...I just got back from Christmas shopping! Yes you read that right! It's just been a never ending cycle of flu, colds, Adrian in the hospital and now Jakov and Mia have ear infections (took them to the doctor's last night!)...anyways I mentioned these chalkboard gift tags I made below...I just used my white gel pen and some white ink to distress it to make it look like chalkboard. For the Christmas tree I just doodled it. The snowman is from a set I designed for the German company Efco. I just stamped it with white ink (or embossing ink if you don't have white) and traced over it with my pen. So if you can't draw or doodle you can use your stamps....just make sure it's not a very intricate design because it will be difficult and a bit messy when you trace over the lines with the white gel pen. 


Here's a card I made this morning using my Seamus stamp set and a SRM sticker. I coloured with my Graph'it markers.


I will announce the winners of both my giveaways tomorrow.
xo

Pin It!

Tuesday, October 21, 2014

snow much fun

Hello!
Hope all is well!


On pinterest I noticed the talented Laura's card and immediately  wanted to recreate it using my  Warm Wishes stamp set (thanks Laura for the inspiration).

So for this card I cut out my card base and then I trimmed down (so that it's a bit smaller than my base) white cardstock and used my circle die to cut out my window. I cut blue cardstock to fit under this 'window'.  I haven't used my SRM stickers in a while so I found this cute sentiment.


I cut two strips of velum to use as snow.


Adhere the velum and trim off the sides that are sticking out. Then adhere the window. onto the blue cardstock.


Adhere the 'window' to the card base, add the sentiment and snowman (which I coloured with my Graph'it markers).


Now while this is cute I thought the snowman would be happier with company so I added the bird and the present (which is from my Mr. & Mrs. Claus stamp set).


I had this stamped image already coloured from a couple of days ago and decided to use my scraps from the card above to create a mini tall card...if you will! ;)
I used my Warm Wishes and Mr. & Mrs. Clause stamp sets.


Have a great day!
xo


Pin It!

Monday, April 21, 2014

just a note

Hi!

Hope you all had a lovely Easter!

I wanted to share this card today...it's a little sneak peek new JD stamps ....like I mentioned before I hand draw my designs on paper and then scan them etc. I always print out my designs first to get a feel of the sizing and if they would be good for colouring, paper piecing, etc. I couldn't help but colour this owl and make a card!


I also used our Geometric Patterns stamp set for my background and did a little bit of heat embossing. Finally my new heat gun arrived!! And did I mention that it's PINK! :)


For the sentiment I used a SRM sticker. And to colour my owl I used Graph'it markers. 


And just a reminder of our sale.....it lasts until Sunday (April 27th).


Have a great day!
xo
Pin It!

Thursday, October 24, 2013

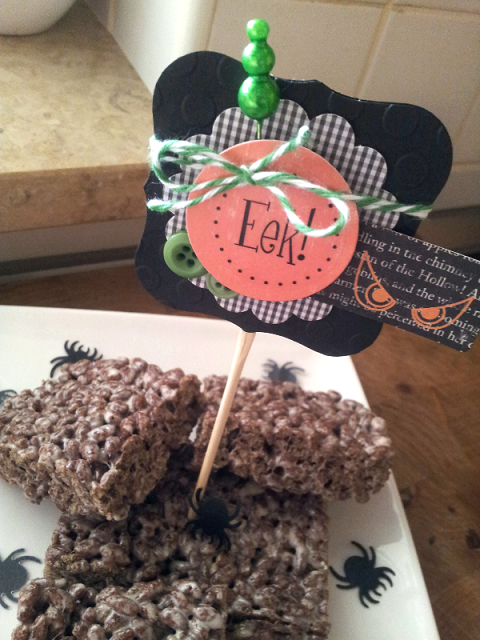
Eek!! Rice Krispie Treats

Hello!
While most of my readers know what rice krispie treats are my lovely Croatians probably don't...I remember the first time I spotted marshmallows at Muller's...I let out a yelp!! For real!! My kids love them...so does my husband, so do I...the neighbours.....


Here's what you'll need:
6 cups rice krispie cereal (I can only find the chocolate kine here)
3 tablespoons butter
10 oz marshmallows

In a large saucepan melt butter on low, add marshmallows and stir until completely melted. Remove from heat. Add rice krispie cereal and mix until all of the cereal is well coated. In a buttered pan using a buttered spatula press the mixture evenly into the pan...if it starts to stick to your spatula just butter it up again.


xoxo
Pin It!